
I recently bought one of the NodeMCU v2 – Lua based ESP8266 development kit, here we will take a look at it
The Development Kit based on ESP8266, integrates GPIO, PWM, IIC, 1-Wire and ADC all in one board. Power your developement in the fastest way combinating with NodeMCU Firmware!
The board has the following features
- Open-source
- Interactive
- Programmable
- Low cost
- Easy to use
- WI-FI enabled
Specifications:
- The Development Kit based on ESP8266, integates GPIO, PWM, IIC, 1-Wire and ADC all in one board
- Fast development with NodeMCU firmware
- USB-TTL included, plug&play
- 10 GPIO, every GPIO can be PWM, I2C, 1-wire
- FCC CERTIFIED WI-FI module
- PCB antenna
- Arduino compatible
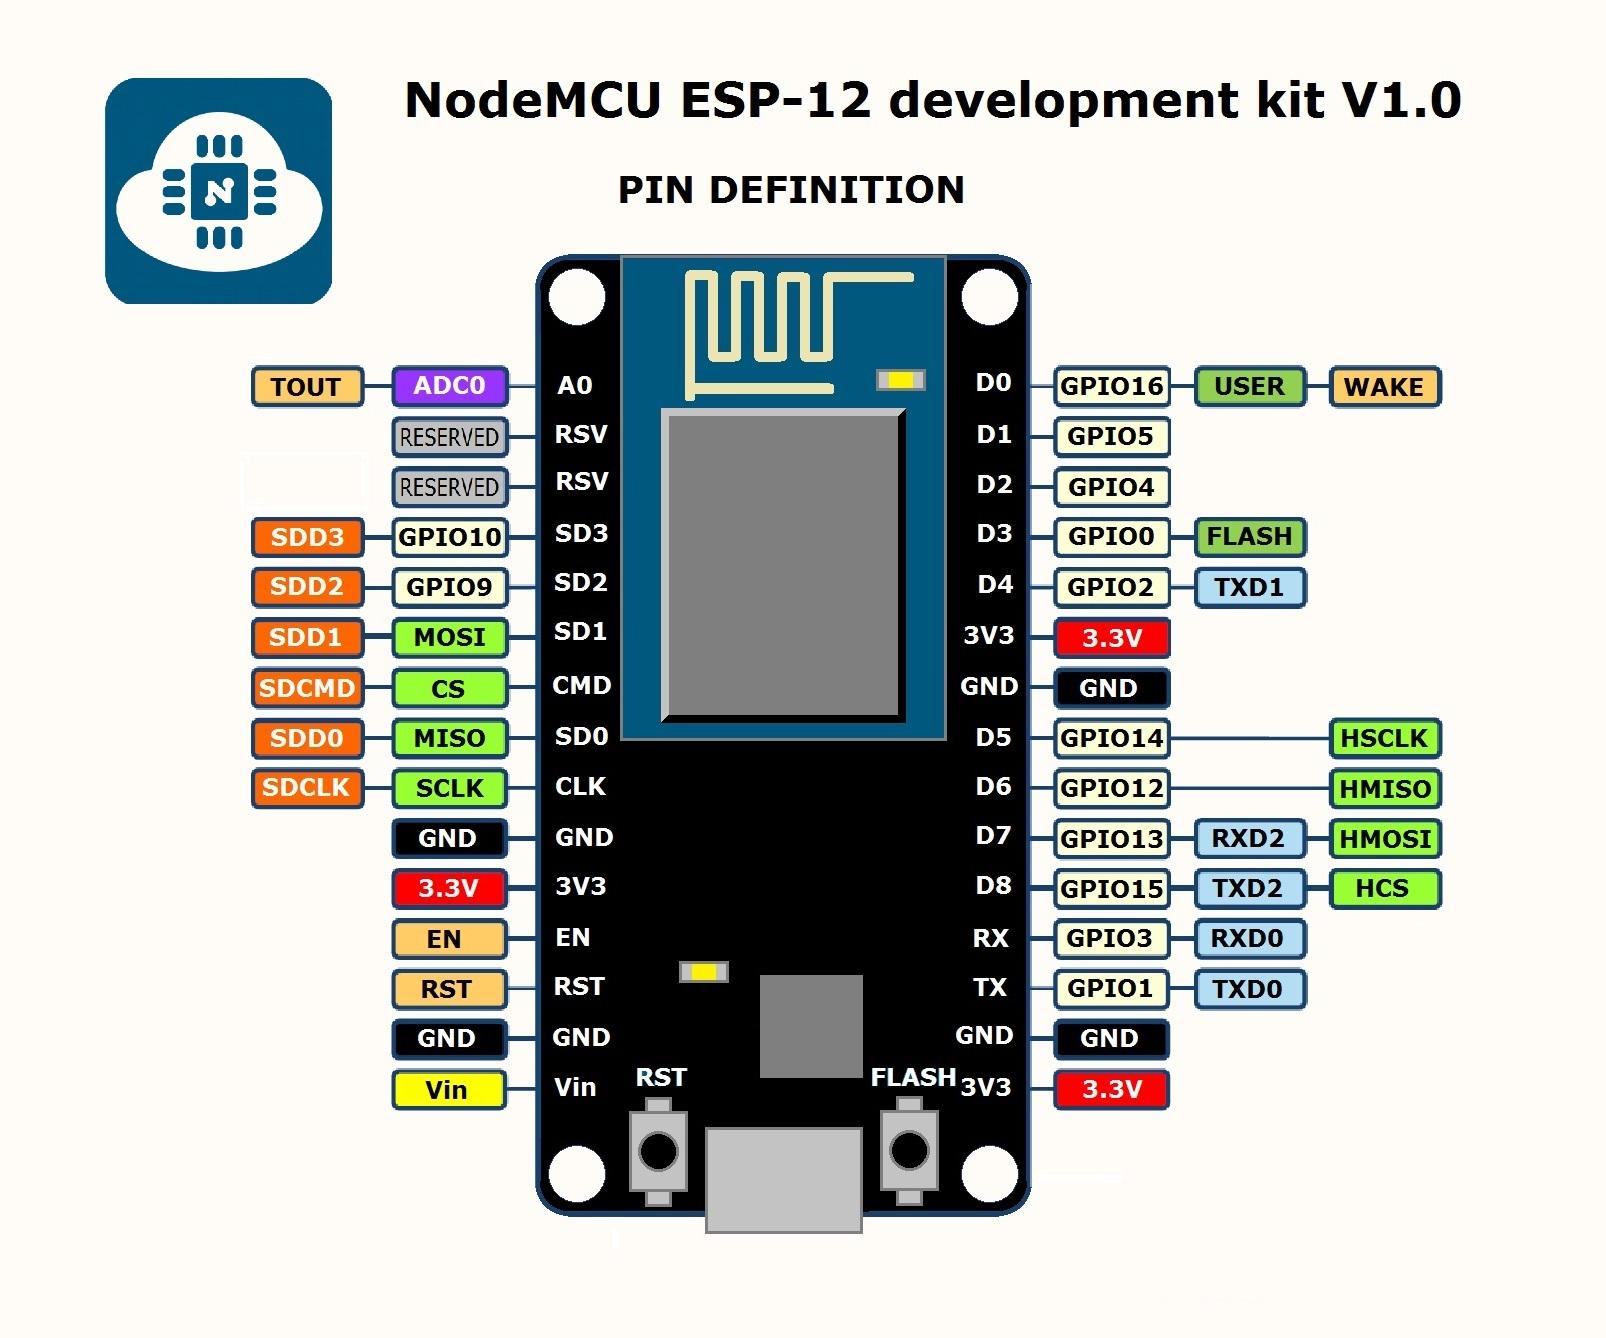
Here is a pinout of the board
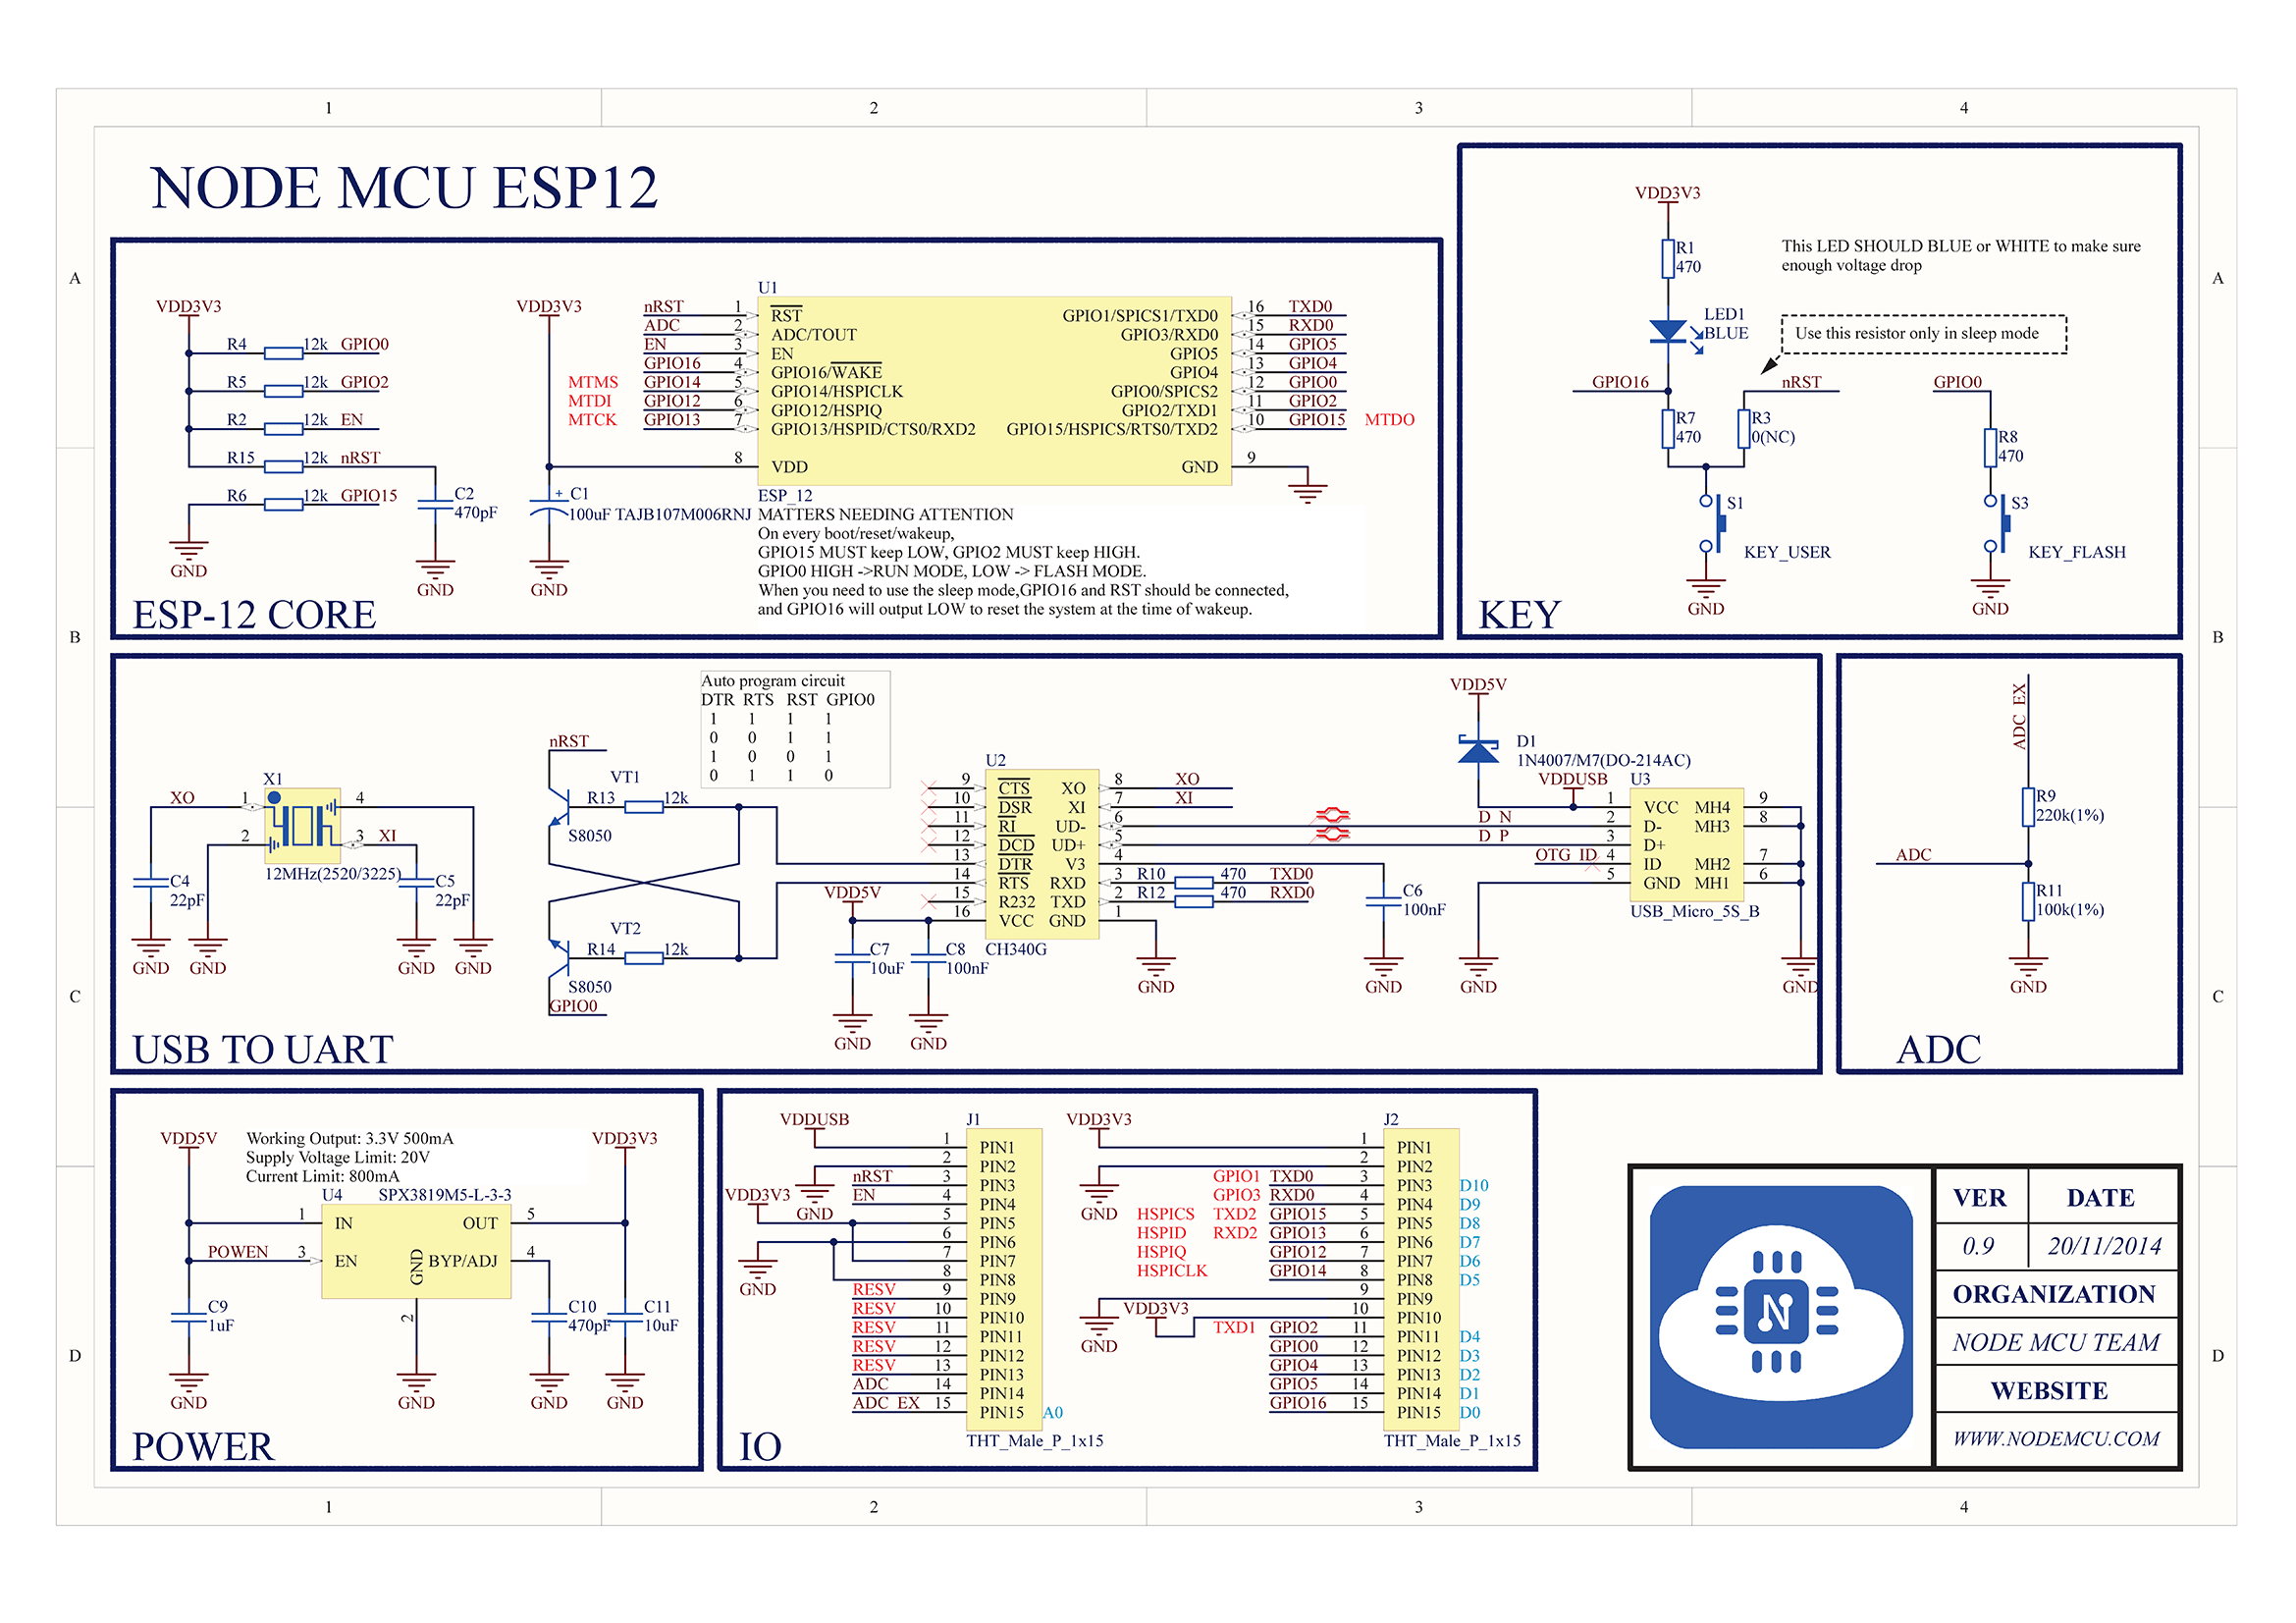
I also manged to find schematics, this being open hardware they are easily accessible via https://github.com/nodemcu
I decided to use the Arduino IDE for development – I already have a post for setting up the IDE at http://www.esp8266learning.com/nodemcu-board-and-arduino-development.php
Code
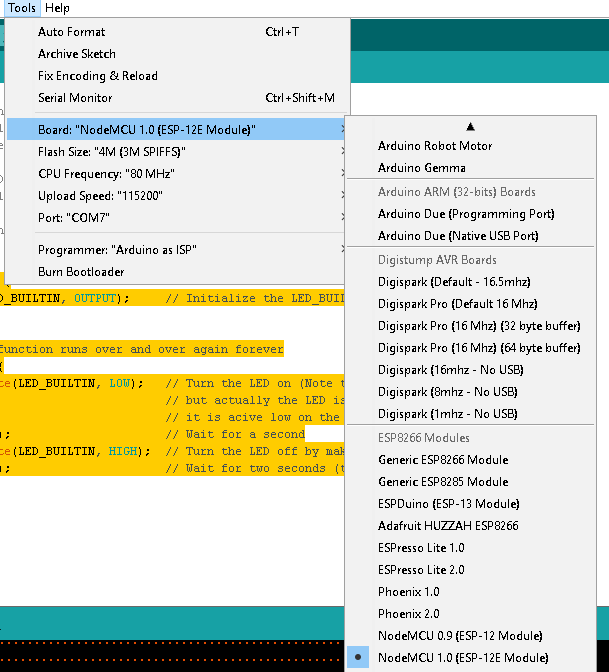
This is the basic blink example, tested on my board. here is a picture of my settings
[codesyntax lang=”cpp”]
void setup() {
  pinMode(LED_BUILTIN, OUTPUT);     // Initialize the LED_BUILTIN pin as an output
}

// the loop function runs over and over again forever
void loop() {
  digitalWrite(LED_BUILTIN, LOW);   // Turn the LED on (Note that LOW is the voltage level
                                    // but actually the LED is on; this is because
                                    // it is acive low on the ESP-01)
  delay(1000);                      // Wait for a second
  digitalWrite(LED_BUILTIN, HIGH);  // Turn the LED off by making the voltage HIGH
  delay(2000);                      // Wait for two seconds (to demonstrate the active low LED)
}
[/codesyntax]
Links
ESP8266 kit NodeMcu Lua Wifi Intternet of Things Development Board DIY Breadboard