
In this example we will connect a Wemos compatible DS18B20 shield to a Wemos Mini and display a page on a web server. This is a combination of our two examples that we have already created and uses 2 shields and a Wemos mini
and
Parts
Here are the parts I used
| Name | Links | |
| Wemos Mini | ||
| LM35 | ||
| Connecting cables |
Code
You will need to add the one wire library via the IDE -> library manager. Since I am using the shield and its set to D2 for the sensor that is what is set in the code, if you prefer to use a different standalone sensor and a different pin change the following line
OneWire ds(D2);
If copying and pasting is too much I’ve know created a githib repo at – https://github.com/getelectronics/ESP8266learning/tree/master/wemos_ds18b20_server
#include <ESP8266WiFi.h>
#include <OneWire.h>

const char* ssid = "username";
const char* password = "password";

OneWire  ds(D2);
WiFiServer server(80);

void setup()
{
  Serial.begin(115200);
  delay(10);

  // Connect to WiFi network
  Serial.println();
  Serial.println();
  Serial.print("Connecting to ");
  Serial.println(ssid);

  WiFi.begin(ssid, password);

  while (WiFi.status() != WL_CONNECTED) {
    delay(500);
    Serial.print(".");
  }
  Serial.println("");
  Serial.println("WiFi connected");

  // Start the server
  server.begin();
  Serial.println("Server started");

  // Print the IP address
  Serial.print("Use this URL : ");
  Serial.print("http://");
  Serial.print(WiFi.localIP());
  Serial.println("/");

}

void loop()
{
  byte i;
  byte present = 0;
  byte type_s;
  byte data[12];
  byte addr[8];
  float celsius, fahrenheit;
  // Check if a client has connected
  WiFiClient client = server.available();
  if (!client) {
    return;
  }

  // Wait until the client sends some data
  Serial.println("new client");
  while(!client.available()){
    delay(1);
  }

  // Read the first line of the request
  String request = client.readStringUntil('\r');
  Serial.println(request);
  client.flush();

  //now the DS18b20
  if ( !ds.search(addr))
  {
    ds.reset_search();
    delay(250);
    return;
  }

  if (OneWire::crc8(addr, 7) != addr[7])
  {
      Serial.println("CRC is not valid!");
      return;
  }

    // the first ROM byte indicates which chip
  switch (addr[0])
  {
    case 0x10:
      type_s = 1;
      break;
    case 0x28:
      type_s = 0;
      break;
    case 0x22:
      type_s = 0;
      break;
    default:
      Serial.println("Device is not a DS18x20 family device.");
      return;
  }

  ds.reset();
  ds.select(addr);
  ds.write(0x44, 1);        // start conversion, with parasite power on at the end
  delay(1000);
  present = ds.reset();
  ds.select(addr);
  ds.write(0xBE);         // Read Scratchpad

  for ( i = 0; i < 9; i++)
  {
    data[i] = ds.read();
  }

  // Convert the data to actual temperature
  int16_t raw = (data[1] << 8) | data[0];
  if (type_s) {
    raw = raw << 3; // 9 bit resolution default
    if (data[7] == 0x10)
    {
      raw = (raw & 0xFFF0) + 12 - data[6];
    }
  }
  else
  {
    byte cfg = (data[4] & 0x60);
    if (cfg == 0x00) raw = raw & ~7;  // 9 bit resolution, 93.75 ms
    else if (cfg == 0x20) raw = raw & ~3; // 10 bit res, 187.5 ms
    else if (cfg == 0x40) raw = raw & ~1; // 11 bit res, 375 ms

  }

  celsius = (float)raw / 16.0;
  fahrenheit = celsius * 1.8 + 32.0;

  // Return the response
  client.println("HTTP/1.1 200 OK");
  client.println("Content-Type: text/html");
  client.println(""); //  do not forget this one
  client.println("<!DOCTYPE HTML>");
  client.println("<meta http-equiv=\"refresh\" content=\"5\">"); //refresh every 5 seconds


  client.println("<H3>DS18b20 temperature example</h3>");
  client.print("Temperature in Celsius = ");
  client.println(celsius);
  client.println("<br><br>");
  client.print("Temperature in Celsius = ");
  client.println(fahrenheit);
  client.println("</html>");

  delay(1);
  Serial.println("Client disconnected");
  Serial.println("");

}
Again open the serial monitor to find your IP address

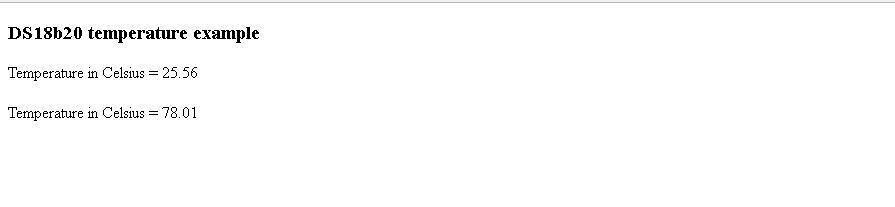
Now navigate to the IP address in the browser and you should see something like this which refreshes every 5 seconds

Perfekt Tutorial and Code,
I have searched for 20 hrs for an easy code
Thanks