
The MLX90614 is a non-contact infrared thermometer with a measurement range from -70 to +380 degree Celsius. Just connect the four leads to your Wemos and you will have a accurate thermometer with a resolution of 0.01 and a accuracy of 0.5 degrees, or for that matter you can use any microcontroller that can communicate with it through it’s I2C interface.
Being an I2C device you simply need to connect to the SDA, SCL and choose a suitable GND and Vin. I used 3.3v to be safe, although the breakout states 3 to 5v.
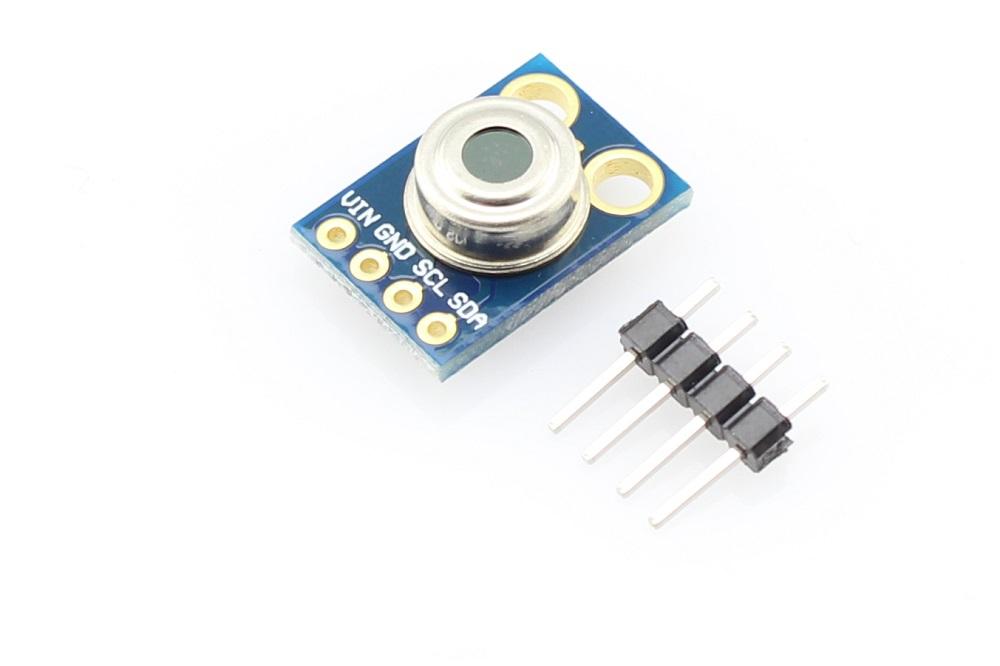
This version I chose comes with a breakout board with all of the components needed for operation. Here is a picture of that breakout board
Features:
Small size, low cost
Mounted on a breakout board with two types of pins
10k Pull up resistors for the I2C interface with optional solder jumpers
Factory calibrated in wide temperature range:
-40 … + 125 ° C for sensor temperature and
-70 … + 380 ° C for object temperature.
High accuracy of 0.5 ° C over wide temperaturerange (0 … + 50 ° C for both Ta and To) High (medical) accuracy calibration
Measurement resolution of 0.02 ° C
Single and dual zone versions
SMBus compatible digital interface
Customizable PWM output for continuous reading
Sleep mode for reduced power consumption
Connection
VIN -> Wemos 3.3v
GND -> Wemos GND
SCL -> Wemos D1
SDA -> Wemos D2
Code
There is a library from Adafruit and rather than reinvent the wheel, here is the basic code example. In practice you connect to an LCD, warning LED or perhaps a buzzer to warn if a certain maximum temperature was reached
The sketch below is fairly straightforward, most of the work is done in the Adafruit MLX96014 library which outputs the result via the serial monitor
[codesyntax lang=”cpp”]
#include <Wire.h>
#include <Adafruit_MLX90614.h>

Adafruit_MLX90614 mlx = Adafruit_MLX90614();

void setup()
{
  Serial.begin(9600);
  mlx.begin();
}

void loop()
{
  Serial.print("Ambient = ");
  Serial.print(mlx.readAmbientTempC());
  Serial.print("*C\tObject = ");
  Serial.print(mlx.readObjectTempC());
  Serial.println("*C");
  Serial.print("Ambient = ");
  Serial.print(mlx.readAmbientTempF());
  Serial.print("*F\tObject = ");
  Serial.print(mlx.readObjectTempF());
  Serial.println("*F");

  Serial.println();
  delay(1000);
}
[/codesyntax]
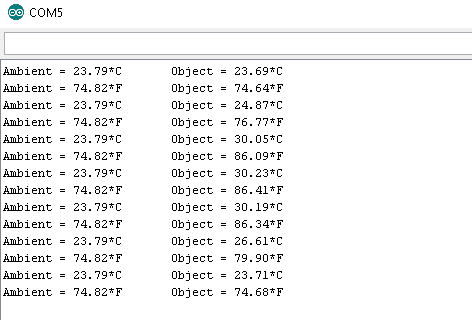
Output
Open up that Serial monitor window and you should see something like the following, the interesting one is the object temperature and how it varied when I placed an object in front of the sensor, the ambient reading stayed the same
Links
Here is a link to the datasheet and also the breakout I purchased, come in at about $6 a piece.
nbsp
MLX90614 datasheet
nbsp
MLX90614 non-contact infrared temperature sensor module iic Interface GY-906

Hello,
To run this program with a Nodemcu or ESP, you must add in the SETUP the pin to use for the I2C:
Wire.begin (2,4);
cordially
How to read 2 sensors?
@Erik said: “How to read 2 sensors?”
You can read as many as 127 of the sensors on the SMBus (actually Arduino uses I2C with these sensors, but the two busses are close enough to work), but each sensor needs a unique address. 0x5A is the factory default 7-bit address of the MLX90614, however you can program a different address. The data sheet explains this, but typically the library you use will have a function that lets you change the address.
How can I read two sensors with nodemcu? I tried to use the MLX90614 and MAX30100(oxullo library) on the nodemcu, but only the MAX30100 gets the correct reading, the MLX90614 always displays 1037.55 ºC. I used an i2c scanner to see the addresses of the two sensors and they are different. I’m very noob with this, anyone can help me or give a hint?