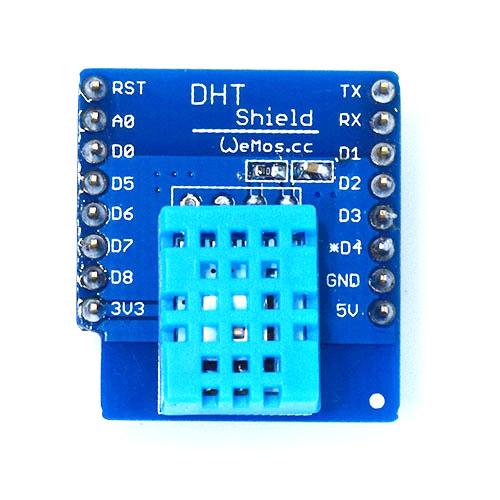
I like the Wemos Mini and when I saw that there were some shields I decided to purchase some of them, in this first example we use one of our favourite sensors the DHT11. Here is a picture of the DH11 shield.
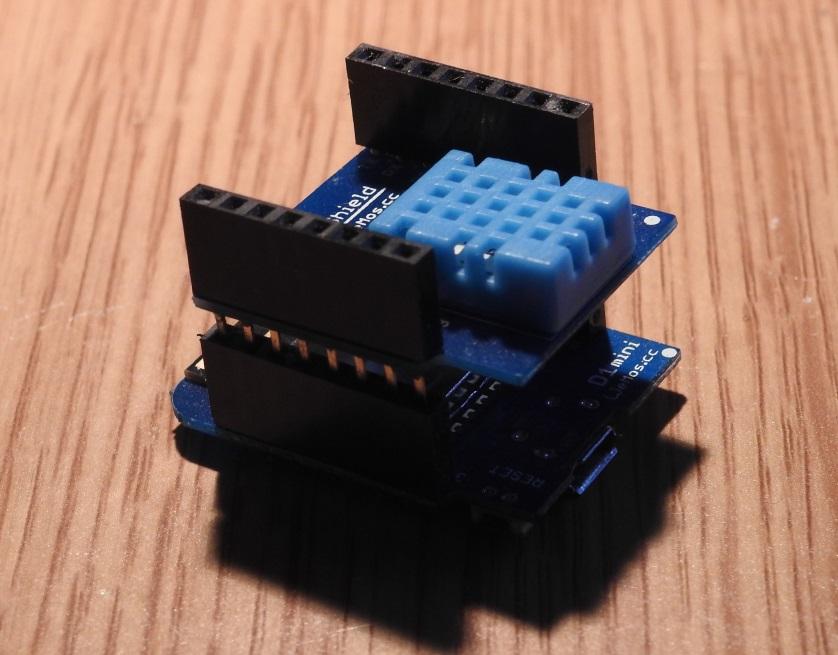
Each shield comes with a choice of header you can solder if you want, as you will be able to see in the code example later the DHT11 connects to D4, one disadvantage of using a shield is this cannot be changed but for beginners and most people this is not an issue as the benefits of using the shield outweigh any drawbacks
Here you can see the DHT11 shield connected to a Wemos mini, again the headers I used allow you to stack another shield on top of the DHt11 such as logging shield or an OLED.
Code
[codesyntax lang=”cpp”]
#include "DHT.h"

#define DHTPIN D4     // what pin we're connected to

// Uncomment whatever type you're using!
#define DHTTYPE DHT11   // DHT 11


DHT dht(DHTPIN, DHTTYPE);

void setup()
{
  Serial.begin(9600);
  Serial.println("DHT11 test!");
  dht.begin();
}

void loop()
{
  // Wait a few seconds between measurements.
  delay(2000);

  float h = dht.readHumidity();
  float t = dht.readTemperature();
  float f = dht.readTemperature(true);

  // Check if any reads failed and exit early (to try again).
  if (isnan(h) || isnan(t) || isnan(f))
  {
    Serial.println("Failed to read from DHT sensor!");
    return;
  }


  Serial.print("Humidity: ");
  Serial.print(h);
  Serial.print(" %\t");
  Serial.print("Temperature: ");
  Serial.print(t);
  Serial.print(" *C ");
  Serial.print(f);
  Serial.println(" *F");

}
[/codesyntax]
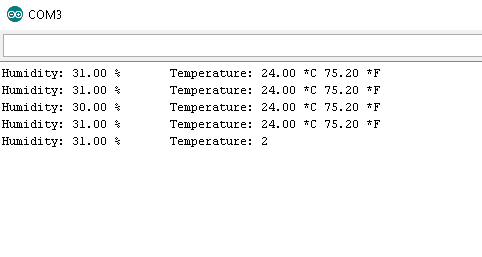
Output
Open the serial monitor and you should see something like this
Links
DHT11 Single Bus Digital Temperature Humidity Sensor Shield For WeMos D1 Min